What is DRSABCD?

First Aid Training
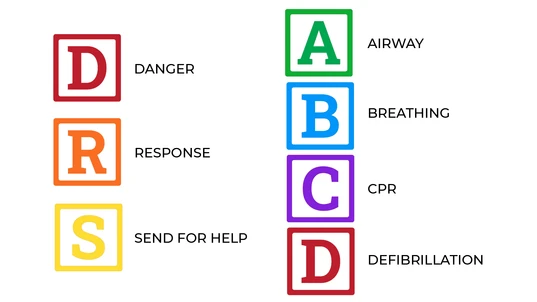
DRSABCD is the acronym for the steps to follow when providing life support.
DRSABCD is a definition of safe procedure in medical emergencies. The acronym outlines an essential action plan for first aid situationsWhat does DRSABCD stand for?
Its meaning focuses on maintaining safety for the injured or ill person, as well as others at the scene, simply by prioritising the order of events. To become even more familiar with DRSABCD, check out the video below:D is for Danger
This is first and foremost. Danger needs to be dealt with before anything else. There is often a physical threat present at first aid situations that involve injuries or illnesses. The potential danger can be a threat to you, to bystanders, as well as to the person already in need of attention. This danger can be present in many forms, including live wires, overflowing liquids, gases, moving vehicles, dangerous animals and people, sharp objects, falling objects, and more. The first step in DRSABCD is to make sure you are not at risk from such a hazard. Then try to ensure that no one else is. If more victims were to be added, first aid quickly becomes unmanageable.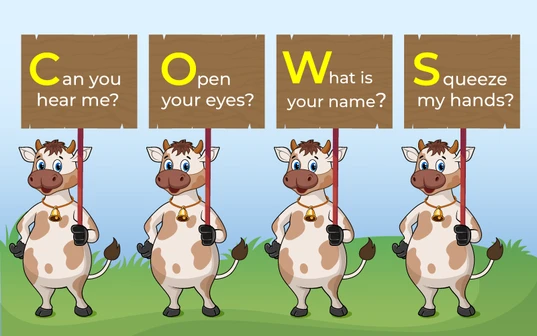
COWS instructions for a response in DRSABCD
R is for Response
Seek a response to find out if the person needing attention is conscious or not. The C.O.W.S. method is an effective way to assess whether the casualty is responsive. It’s easy to remember and involves, talking to, touching the casualty, and using both questions and commands. COWS instructions for a response in DRSABCDCan you hear me?
Ask, can you hear me? Are you hurt or sick? Also, ask if you can help the casualty. This has the added advantage of gaining consent, or not, as well as eliciting a response.Open your eyes.
Instructing the casualty to open their eyes is the most instinctive action the casualty will take, if they are able to. If their eyes are open, are they able to 'look left', 'look right' etc.What is your name?
Asking their name is also instinctive. It does not matter if they give the correct name, so long as they respond to your question.Squeeze my hands.
Squeeze the casualty's hand to see if they squeeze you back. A casualty that cannot hear you, may feel your squeeze and respond accordingly. There’s no need to aggressively shake a casualty to gain a response. Definitely don’t shake a child or infant. Simply touching the casualty’s hand or shoulder and talking assertively is effective and will awaken a sleeping person. It’s possible for a casualty to be conscious but not respond. For example, a person having an Absence Seizure will be conscious but will be unable to respond to questions and commands. A casualty who is unresponsive should be treated as unconscious. If the casualty responds by speaking or moving and appears conscious, leave them in the position in which you found them (provided there’s no further risk of danger). This response will help determine your next first aid steps. Conduct a ‘secondary survey’ — a verbal and visual assessment of their condition. The verbal assessment would include questions such as:- What happened?
- Are you injured?
- Do you have any pain?
- Do you feel ill?
- Do you have a medical condition?
S is for Send for help
First aid treatment is not a substitute for professional medical care. In a medical emergency, you should waste no time calling for an ambulance or emergency services. In order to stay focused on the casualty, have someone else in your vicinity make the call for help on your behalf. It’s important to send for help as early as possible.- Shout for help to alert people nearby
- If you can, have a bystander call for an ambulance
- Ask someone to locate and fetch an AED if possible
- If no one else is around, call the ambulance on your mobile phone
- Which emergency service do you want, Ambulance, Fire or Police?
- What is the exact location of the casualty? (Tip: use your phone apps to find your location e.g. Google Maps)
- Your name and phone number (to call you back if required)
- The nature of the emergency (tell them what you think has happened)
Looking to get you First Aid knowledge up to date?
We run certified First Aid courses throughout all major Acustralian citys. Find a location near you.
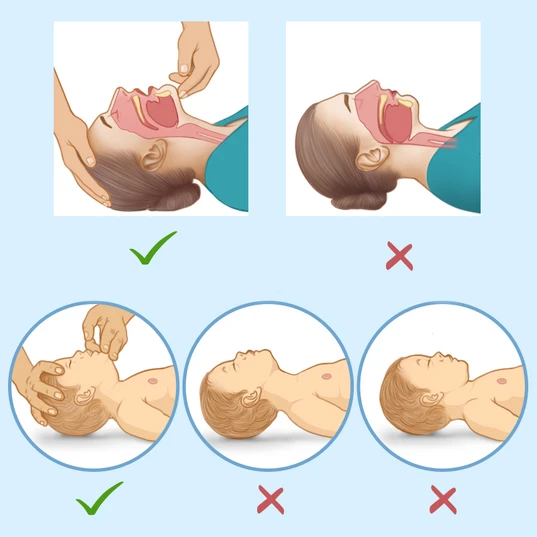
An open airway with a proper head tilt and chin lift prevents the tongue from obstructing the airway
A is for Airway
The casualty’s airway should be checked. This takes priority over any injuries. Obstructions to the pathway to the lungs will restrict breathing. If possible, check the airway without moving the casualty. If it appears there are obstructions in the casualty’s mouth, you may need to roll the person onto their side — carefully, with their spine, neck and head aligned. This is known as the Recovery Position. See our guide to placing a person in the Recovery Position. Open the casualty’s airway by lifting the chin and tilting their head back. Look into the back of the throat to check obstructions, especially:- The casualty’s own tongue, as it can fall back into the airway
- Regurgitation – stomach content rising into the oesophagus but not being vomited
- Foodstuffs
- Loose dentures, mouth-guards
- Fluids, such as saliva, blood, mucus
- Foreign items
- Place your hand on the forehead
- Place your fingertips under the point of the casualty’s chin
- Gently tilt the head back and lift the chin to open the airway
B is for Breathing
Check that the person is breathing.- Look to see if the chest rises and falls
- Listen at the mouth for sounds of normal breath
- Feel for air against your cheek/li>
C is for CPR (Cardiopulmonary Resuscitation)
CPR should be performed straight away when a person is unconscious and not breathing. With the person face-up, laying on their back, place the heel of your hand on the centre of their chest, your other hand across the top of it. Press down firmly to about a third the depth of their chest — about 5cm, or 4cm in the case of an infant. Following 30 chest compressions, give 2 rescue breaths if you’re comfortable with mouth-to-mouth. To administer, tilt the person’s head back and lift their chin, pinch their nose and place your mouth over theirs. The compression ratio is 30:2 (30 compressions to 2 rescue breaths), which is approximately 100-120 compressions per minute. Adults receive full breaths, shallow breaths for children, and just 2 puffs for infants. Breaths are optional. If you’re not comfortable with mouth-to-mouth, stick to compressions. Continue CPR until the casualty responds or until paramedics arrive to take over.
D is for Defibrillation
A defibrillator or AED (automated external defibrillator) is the next step if the person is still unconscious and not breathing. This portable, compact, lightweight machine can ‘jump start’ the heart. When appropriate, it will automatically deliver an electrical shock aimed at restoring muscle contractions and returning the heart its normal rhythms. AED units come with pad electrodes, a battery and adapter, if applicable. Verbal instructions are inbuilt with most modern AEDs, making it straightforward to use the device correctly. Often an AED will be located close by. They are to be found not just in hospitals, clinics, and ambulances, but also in many public places, including schools, shopping malls, libraries, airports and offices. At the scene of the emergency, you would probably need to ask a bystander to try to locate and fetch the AED. Assuming an AED is available, use it straight away, following its accompanying instructions. The diagram below shows where to place the AED electrode pads. If you would like to know more about how an AED works and some common myths associated with AED's, please visit our AED First Aid article.
Recommended resources
We also have a first aid chart on DRSABCD that can be downloaded and printed in A2 size or smaller.
Originally published at
https://www.australiawidefirstaid.com.au/resources/what-is-drsabcd
as part of the Australia Wide First Aid Articles Library
Related Articles
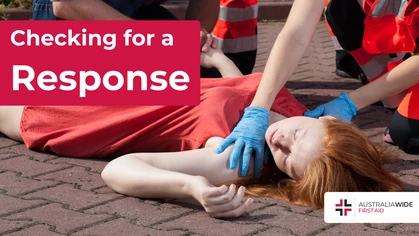
Checking for a Response
Checking for a response is critical before proceeding with any first aid assistance. Knowing if a casualty is conscious or not allows you to use the appropriate techniques. Using gentle but firm responsiveness techniques, such as the COWS method, mean you can check for a response while remaining respectful to the casualty.
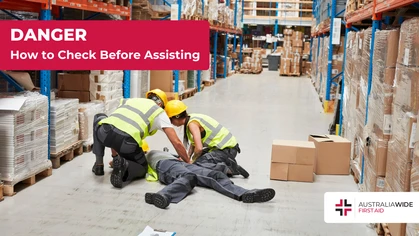
How to Check for Danger
When coming across someone who appears unconscious, injured, or in need of medical help, it’s instinctive to rush to their aid. Ensuring the scene is safe before assisting the person is not only a fundamental principle of first aid but also critical to preventing further harm.
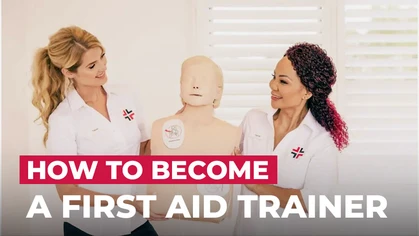
How to Become a First Aid Trainer
Becoming a first aid trainer in Australia is a rewarding and impactful career choice that allows individuals to make a significant contribution to the community by imparting life-saving skills.
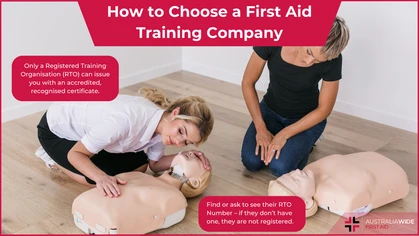
Choose a First Aid Training Company
With a seemingly endless supply of offerings for CPR and First Aid training, it can be difficult to determine the best option for you. So how can you tell if a provider is legitimate?
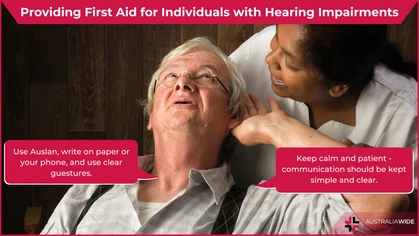
First Aid for Those with Hearing Impairments
When providing first aid to someone with a hearing impairment, it's essential to adapt your approach. Effective and respectful first aid can still be administered, even if you don’t know Auslan.

6 Common First Aid Mistakes and How to Fix Them
Time-sensitive emergencies can place enormous stress on even the most effective first aider and cause them to make mistakes. We've written this article to help you understand the dos and don'ts of common first aid procedures, and protect the casualty from further harm.

Get First Aid Certified at our New Cessnock Training Location
We are so excited to announce that we have opened a new first aid training location at Cessnock, the largest town in NSW's Hunter Valley wine region.
First Aid Training Mount Isa
Our Mount Isa first aid courses are innovative, inexpensive, and nationally accredited. Upon completing our Mount Isa first aid courses, you will have the knowledge and skills to manage a variety of medical emergencies.
First Aid Course in Ballarat
Our first aid courses in Ballarat are innovative, inexpensive, and nationally accredited. Upon completing our first aid courses in Ballarat, you will have the knowledge and skills to manage a variety of medical emergencies.
First Aid Course Port Adelaide
Our first aid courses in Port Adelaide are innovative, inexpensive, and nationally accredited. Upon completing our Port Adelaide first aid courses, you will have the knowledge and skills to manage a variety of medical emergencies.